How Do You Paint Rocks in Oil Color
How to paint a seascape using oil paints
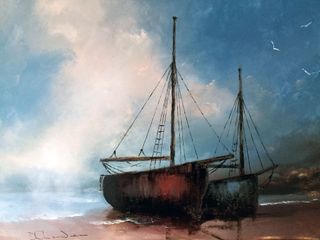
By learning how to paint a seascape, you'll understand how to add a dream-like, dramatic quality to a scene. Through blending and balancing colours, and adding just the right detail to clouds, sky, sea and boats, you can create a scene that evokes the sensation of the marina.
Marine art, which includes the ability to paint a seascape, is a challenging part of being an artist, but this tutorial will help you to get the basics right using oil paints (though you could apply many of the techniques to different media). If you want to further explore oil painting, see our guide to the oil painting techniques you need to know about. And for more general drawing advice, head to our how to draw tutorial roundup – which will get you drawing everything from dogs to drops of water.
If you need to stock up on materials, then don't miss our guide to the best oil paints.
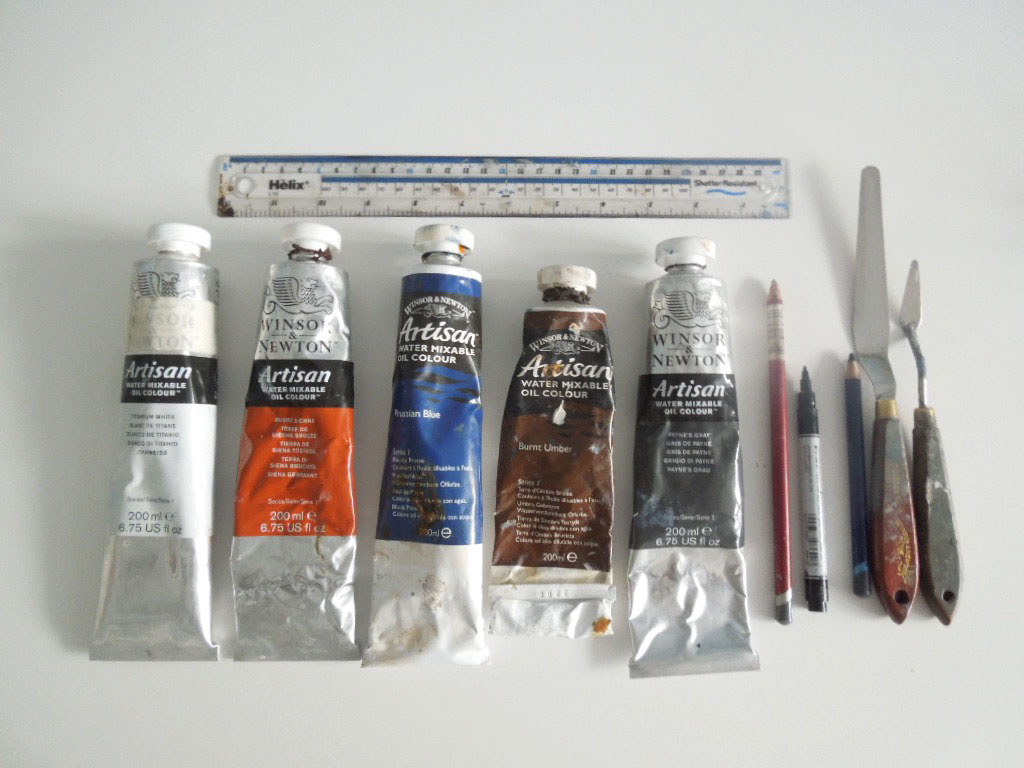
01. Create colours
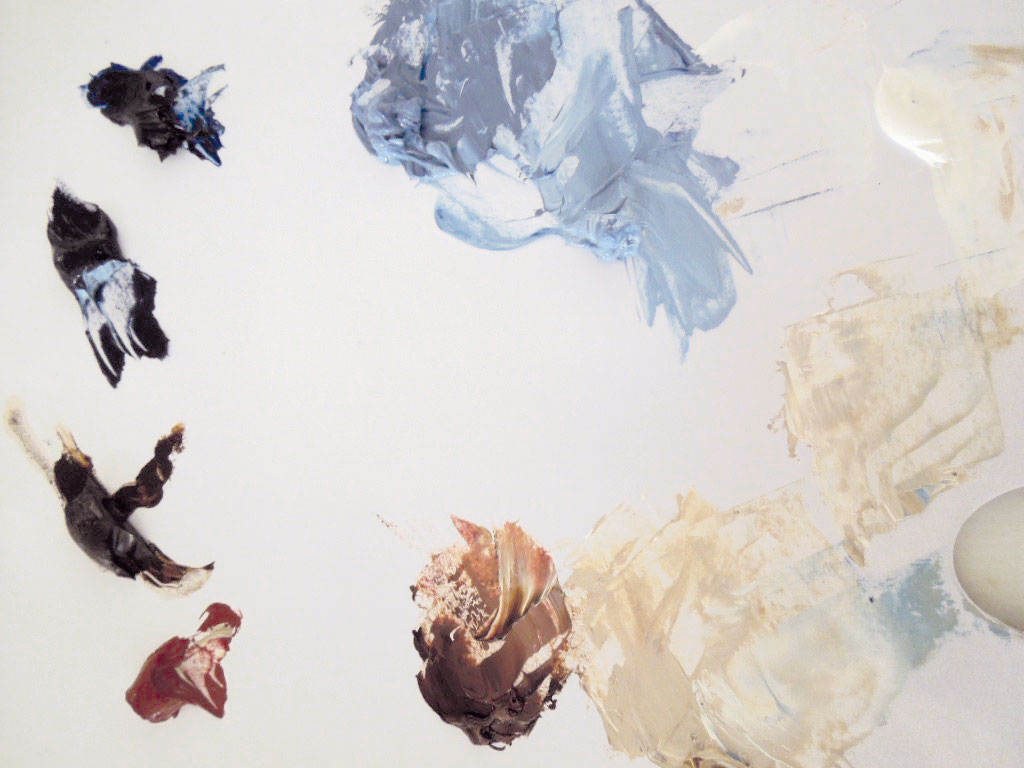
(Image: © David Chambers)
Mix your palette – Burnt Umber, India Red (dark and light shades), Prussian Blue, Payne Grey (dark and light shades), and make sure you get a good contrast in the colour. The light pink you create will give you the light areas for painting the sky. The grey-blue on the palette should be both dark and light – this is for the deep contrast we want to achieve.
02. Start with the sky base
(Image: © David Chambers)
Let's start with the sky. Apply the dark blue-grey to the left or right of the painting, then your lighter pink to the left or right of centre. Next, apply the lighter grey – in this case, on the left. Let the painting go slightly tacky.
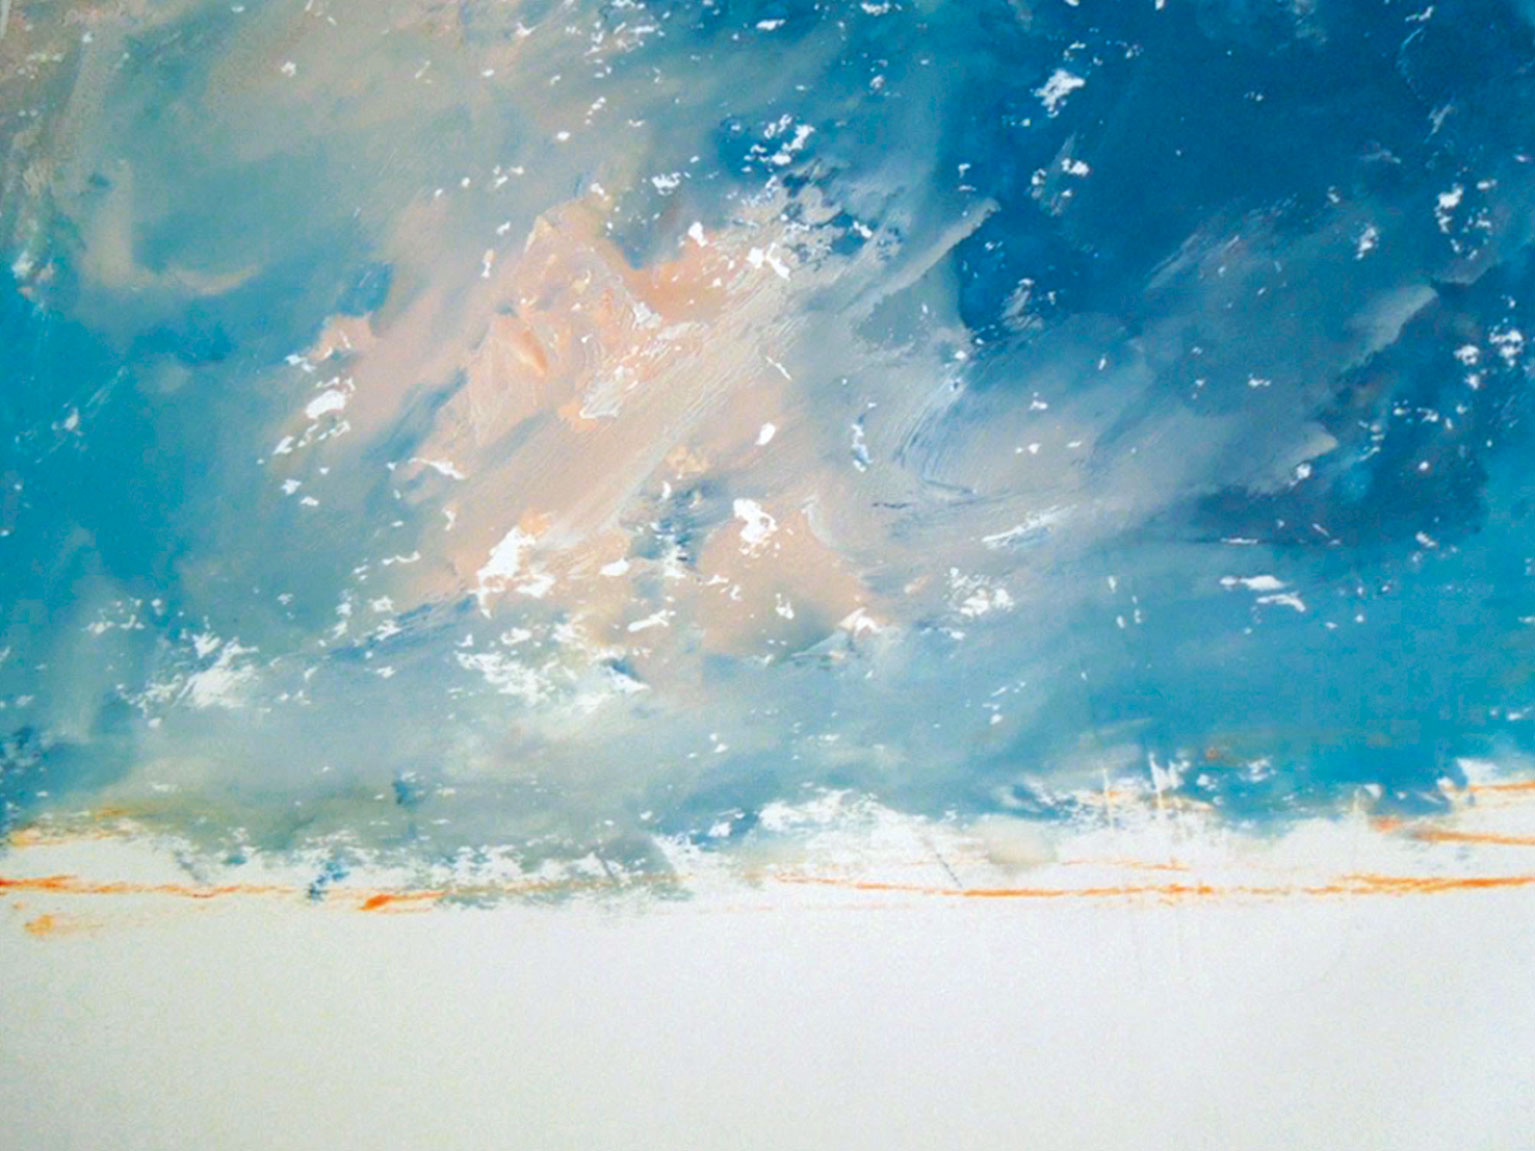
03. Blend together
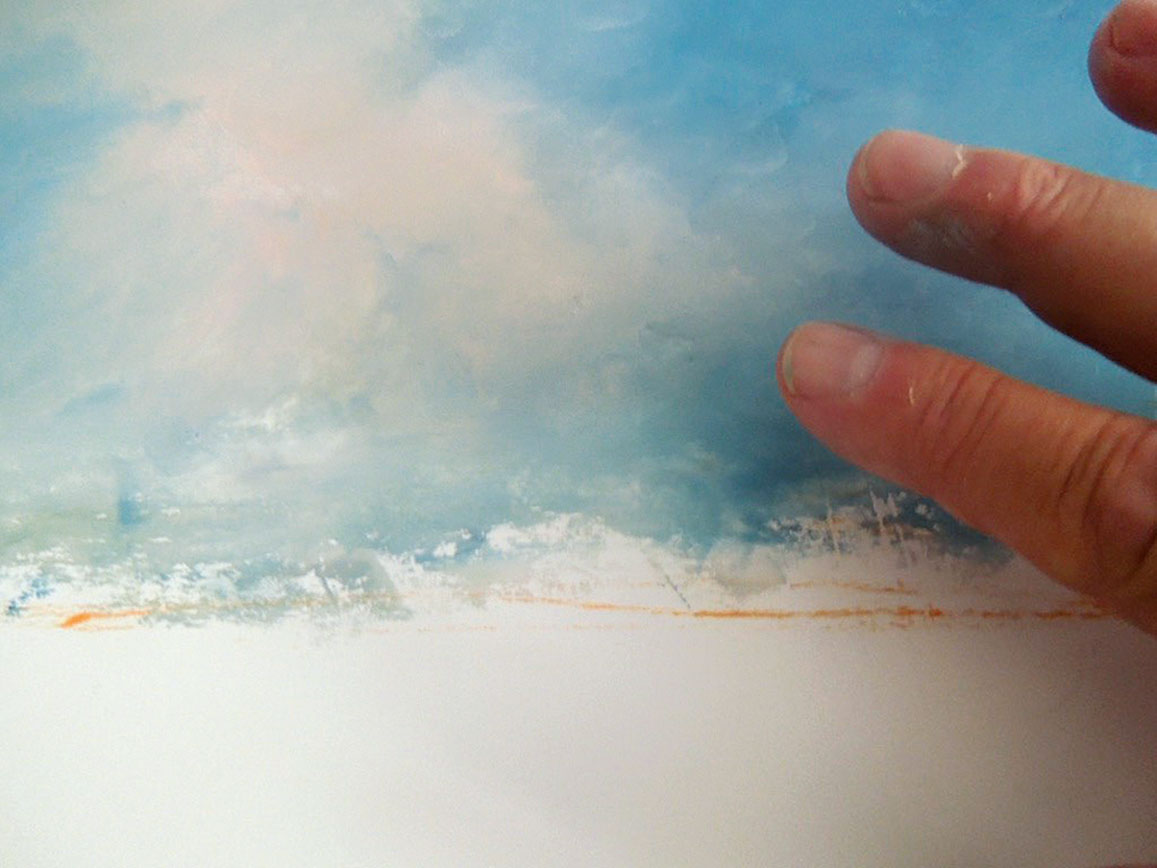
(Image: © David Chambers)
Now blend the sky using a brush, a knife or your hand. Start with the lighter area at the edge and introduce some light cloud. Next, move to your darker colour and blend in towards your light source. Now the same with the light grey. With this you will have created a dynamic to the painting, and this will be the most important step, as it dictates where we now go.
04. Build the scene
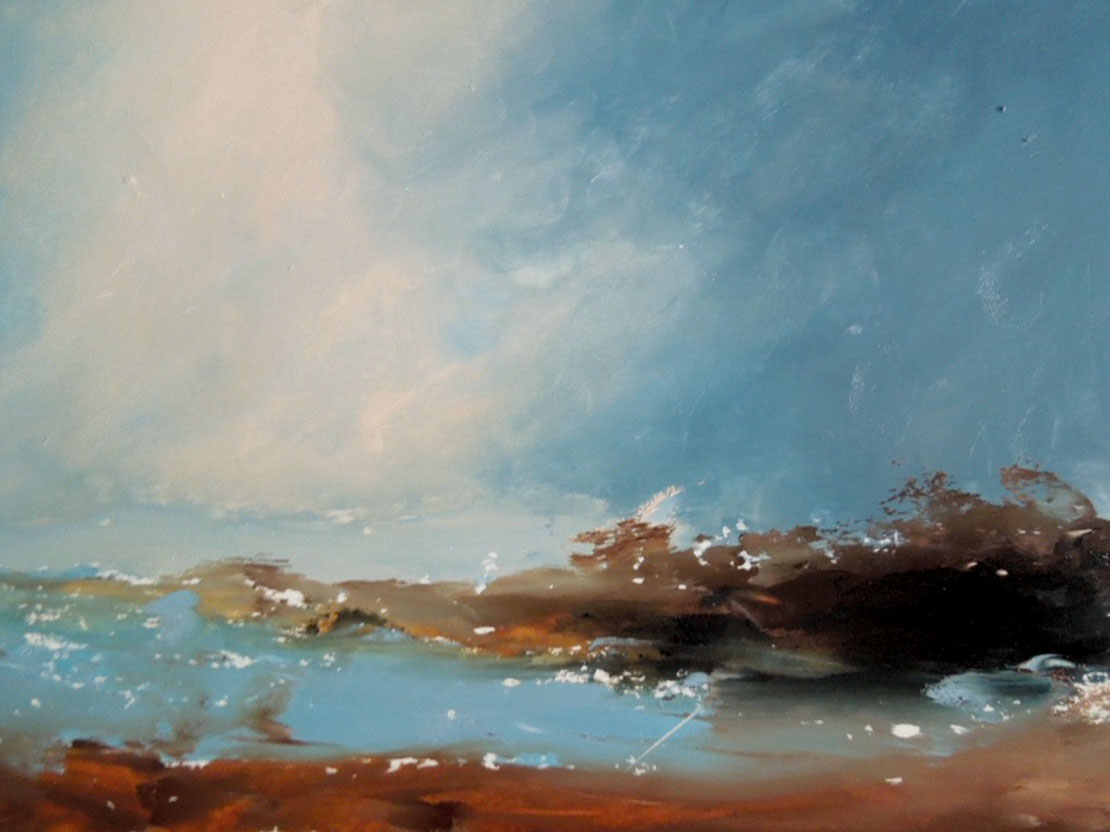
(Image: © David Chambers)
For the foreground, keep your lighter grey under the light source for the water. This will enhance the focal point of the painting. Use your darker Burnt Umber and India Red for the beach. Apply more Burnt Umber to give a darker area, then blend with a brush, a knife or your hand.
05. Add details
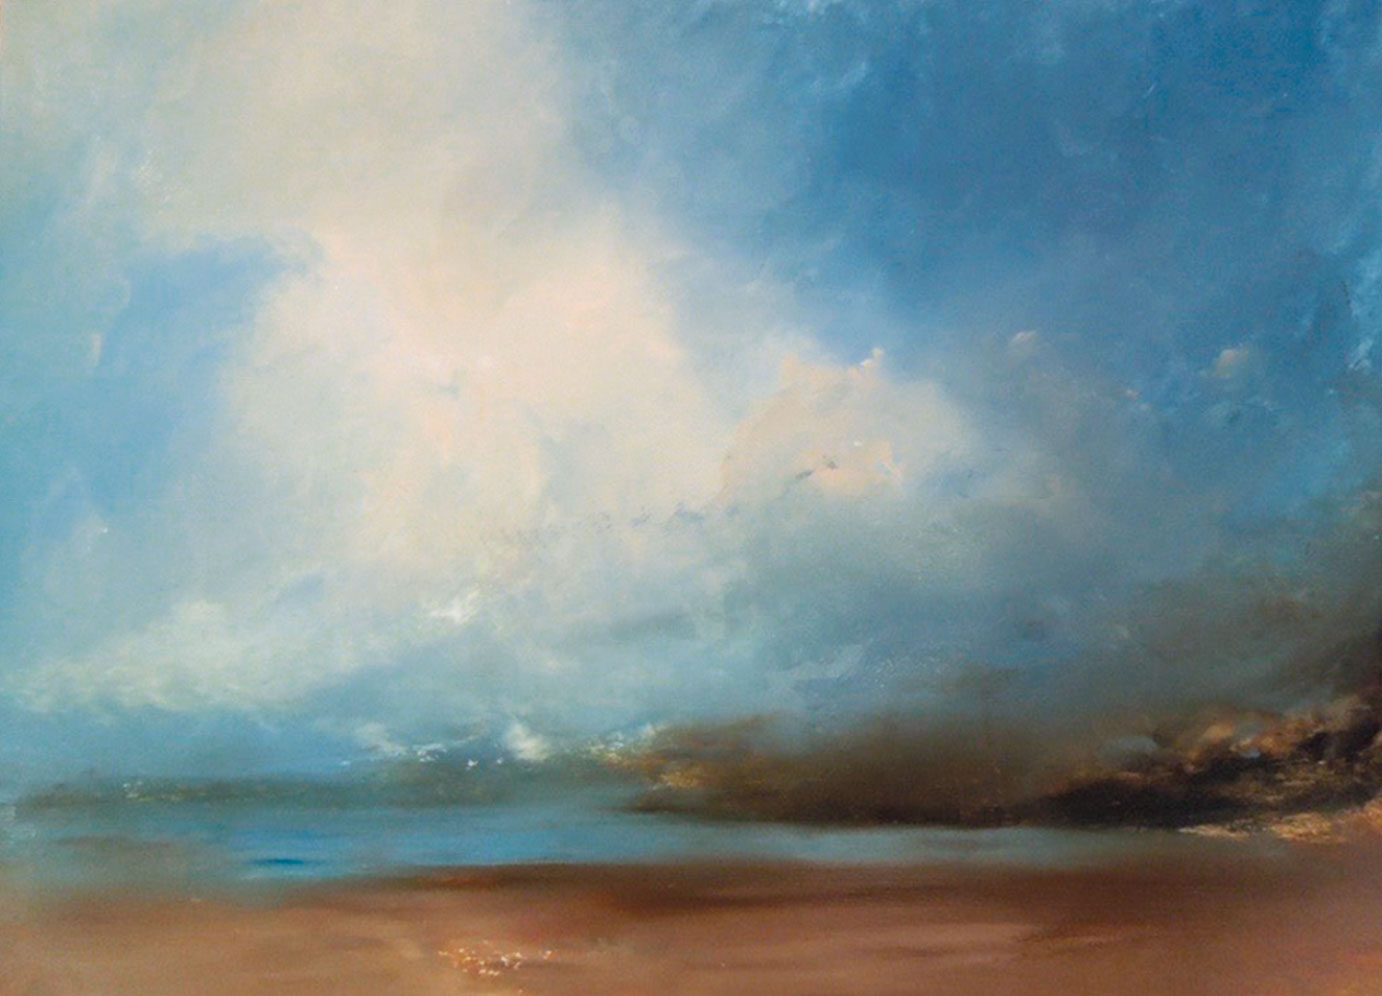
(Image: © David Chambers)
For the background, the lower skyline, use Burnt Umber and Payne Grey to form a tree line, hills or cliff face. This will give the painting better perspective. Be careful not to go onto the light source area. Blend in as before.
06. Add depth
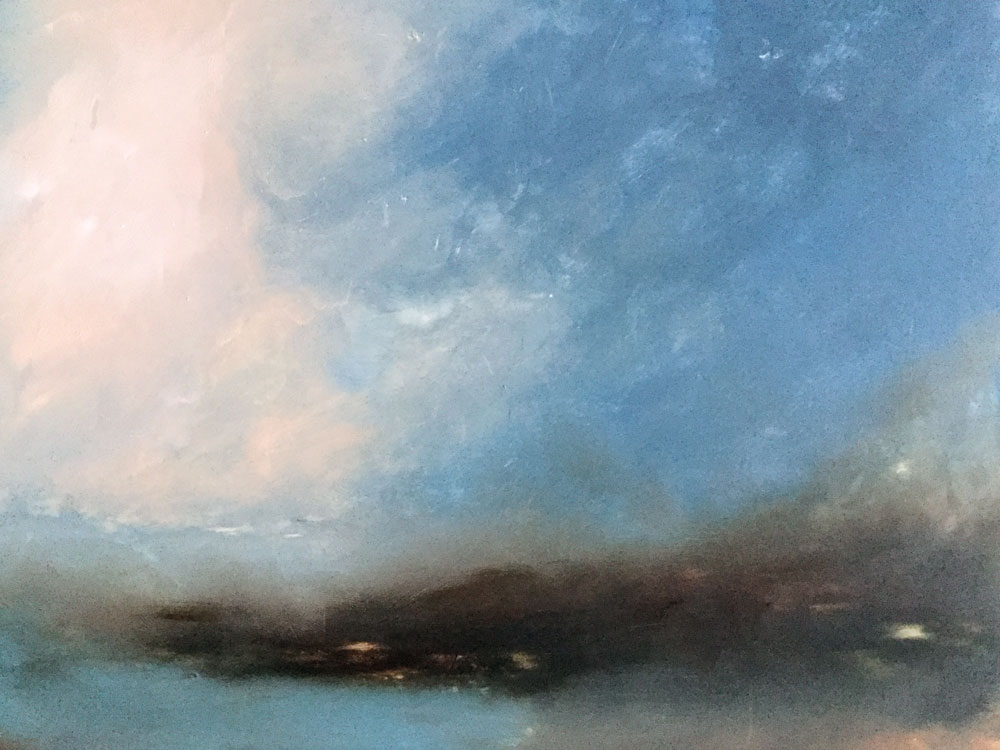
(Image: © David Chambers)
This is the most important part of my paintings. If you're not satisfied with the painting so far, add more dark or light, but let it dry first or it will get messy. When dry you have the main part of the painting complete. Sometimes unintentional things happen and look great, so leave them alone.
07. Begin part one of the boat
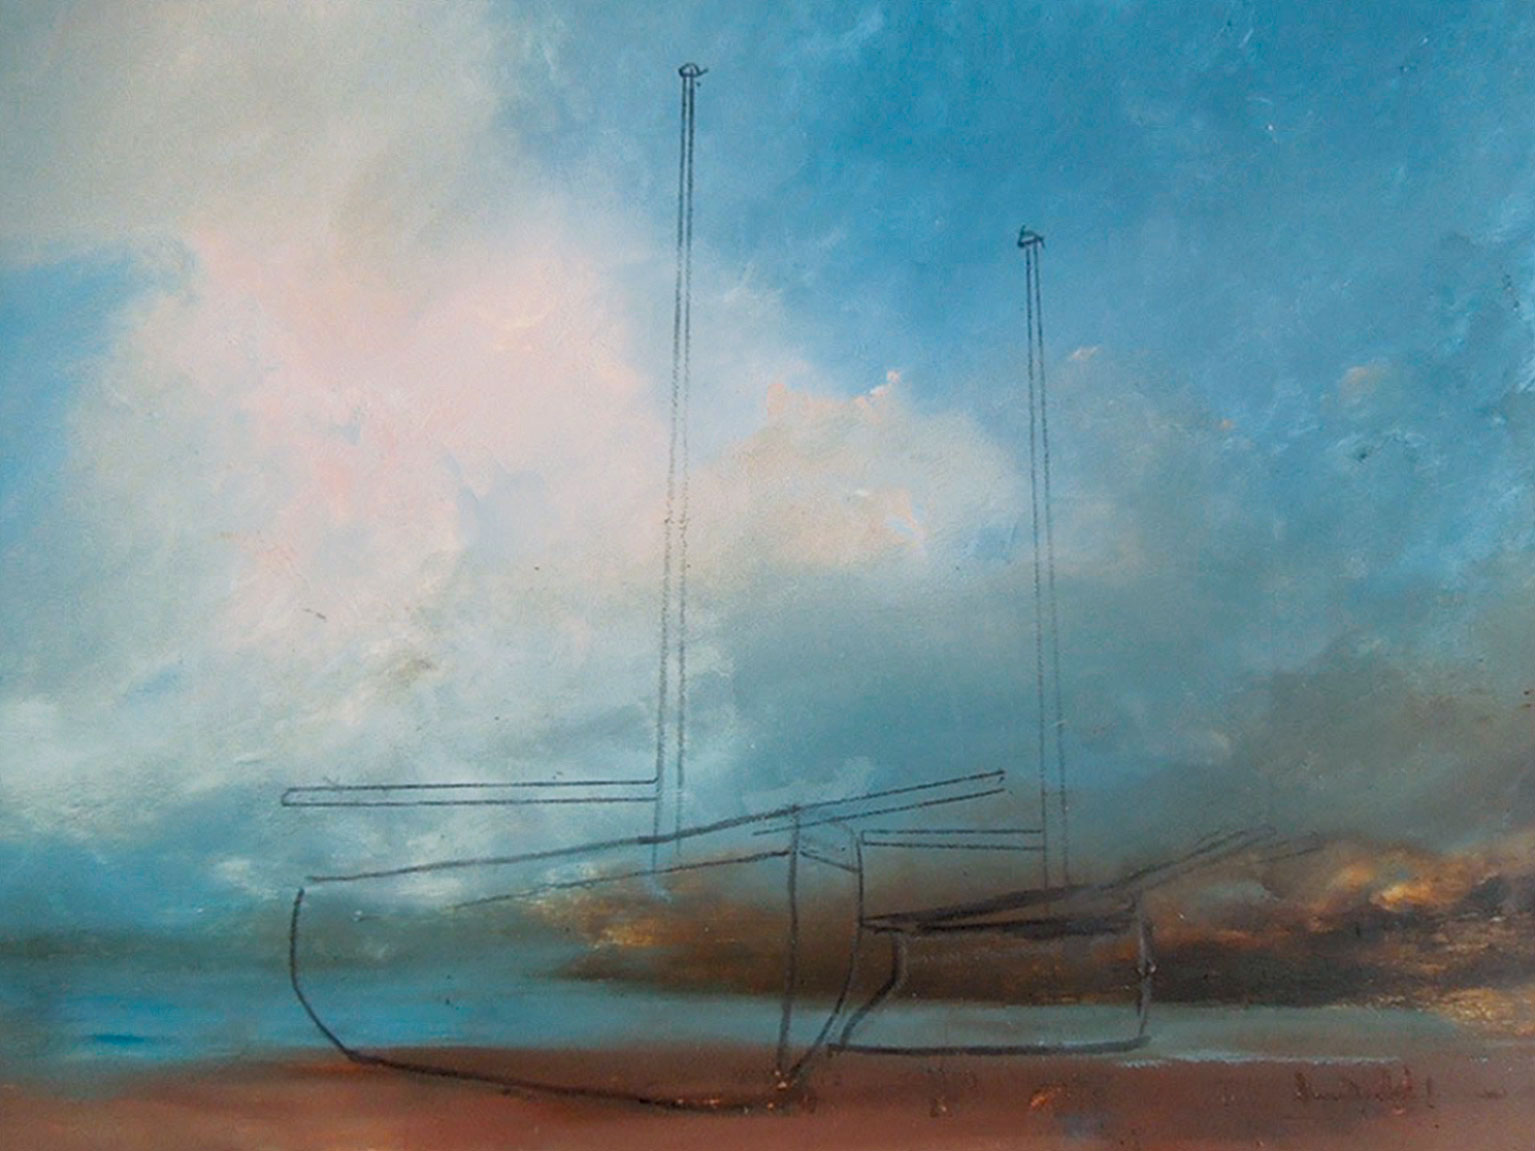
(Image: © David Chambers)
Once you have decided on the boats, sketch them onto the dry painting, but be sure to decide the best position for the boats beforehand. Keep the boats so the mast will go through the light area on the main boat and the dark area on the smaller boat. We prefer masted boats as the rigging always brings the painting to life.
08. Move onto part two of the boat
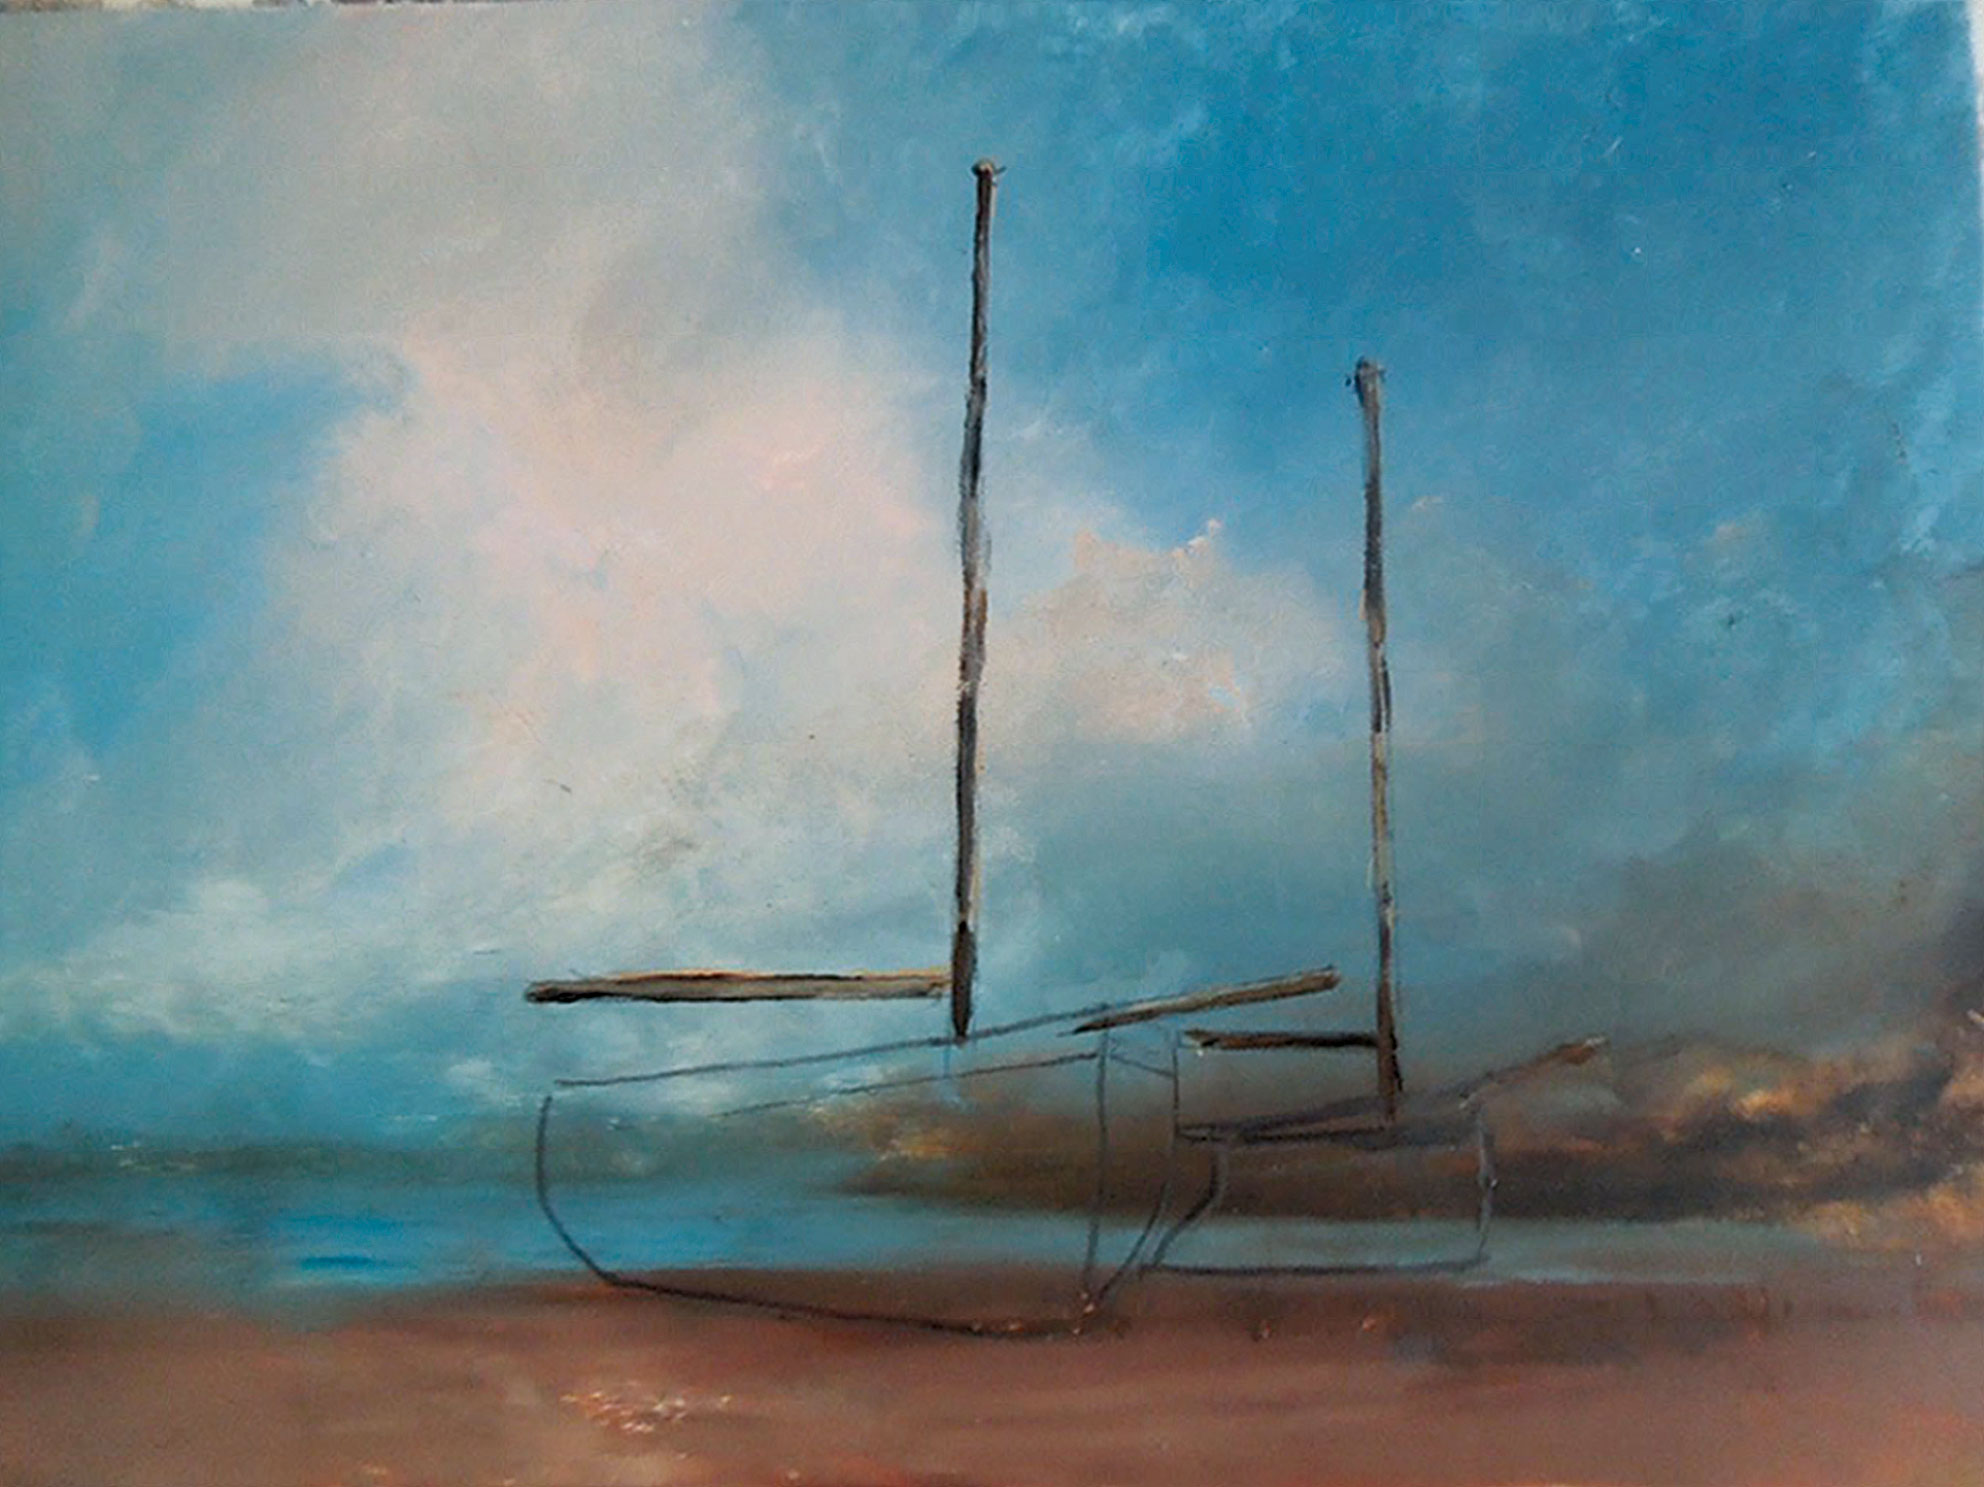
(Image: © David Chambers)
Paint in the masts and bowsprit and create light and dark areas. Remember your light source! Here, a lighter Burnt Umber is used for the light areas and Burnt Umber and Payne Grey for dark areas
09. Add part three of the boat
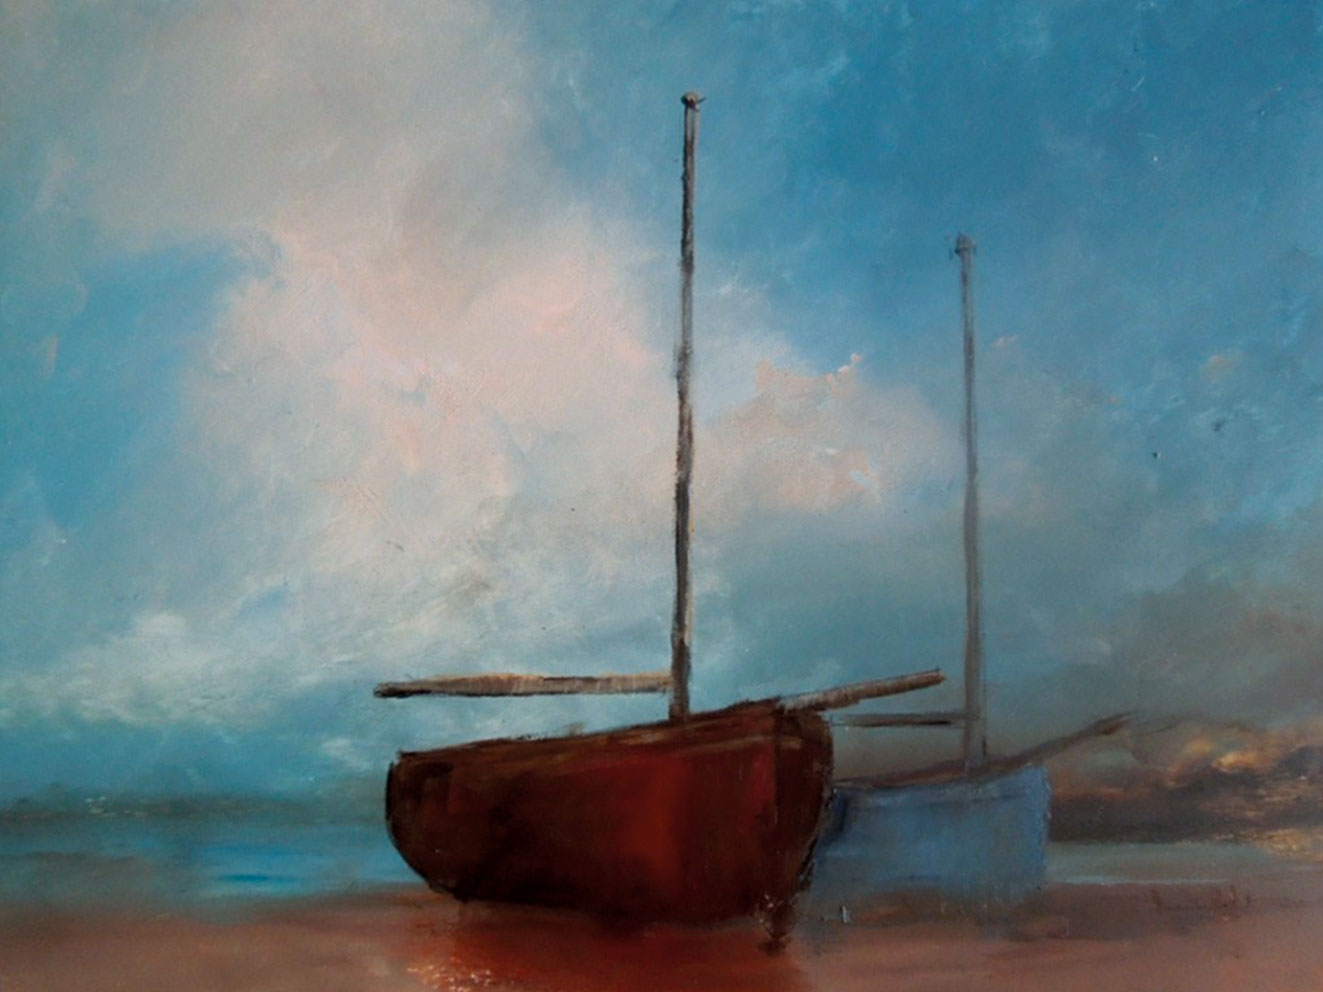
(Image: © David Chambers)
Add some colour to the boats, keeping the smaller boat a grey colour to create distance. Make the larger boat more vibrant – use Burnt Umber and India Red, or any other colour that will make it stand out.
10. Add rigging

(Image: © David Chambers)
Draw in the rigging with a pencil. You can use a bendy ruler for shaping the ropes – this will enhance the mood of the painting. Study how the rigging on the working boat would be. When you're happy with the position of the rigging, use darker paint, oil pencil or marker pen to make them bolder.
11. Complete further details

(Image: © David Chambers)
Add more colour to the boats if required, keeping the smaller boat a grey-blue to give it that distance, with the main boat Burnt Umber and India Red to make it stand out. Add some shadows to the beach, too.
12. Give it a final Polish
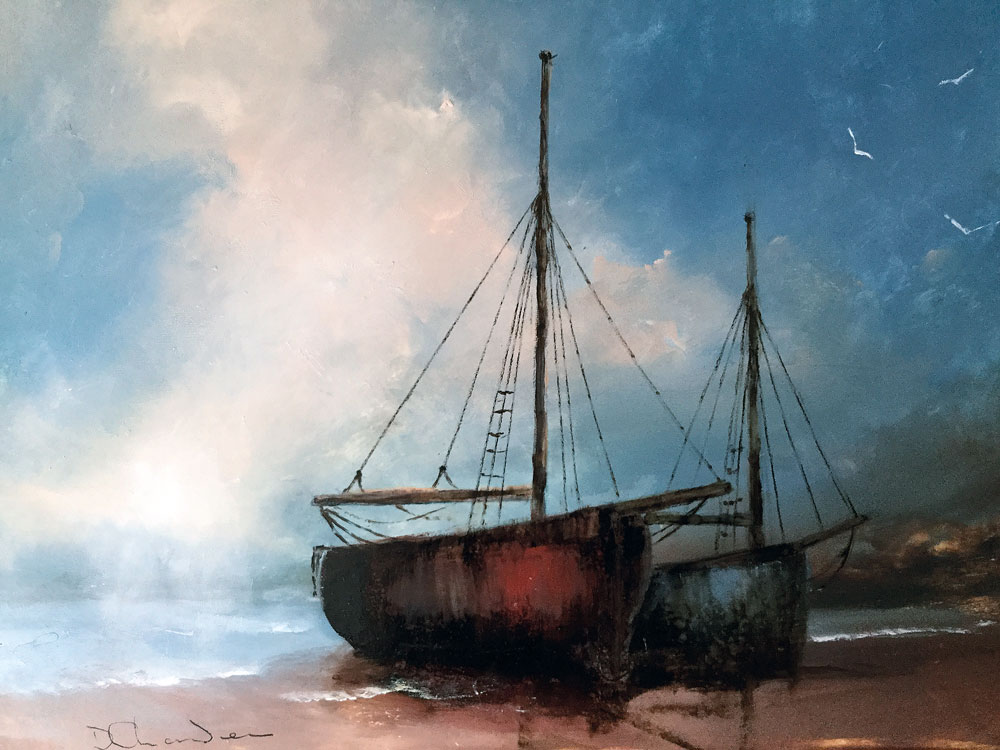
(Image: © David Chambers)
Add your dark colour when the other paint is dry. Mix Burnt Umber with Payne Grey, or use black, to darken the boats down, being sure to leave light areas. Hang a few ropes off the boat and enhance the shadows. Carefully dab with a little white spirit on some kitchen towel to give the illusion of an aged fishing boat. Add waves lapping onto the shore and a few distant seagulls.
This content originally appeared in Paint & Draw: Oils. You can buy the Oils bookazine here . Or explore the rest of the Paint & Draw bookazines .
Read more:
- Painting skin tones: 10 top tips for getting it right
- How to stretch a canvas and set up for oil paints
- How to paint sunsets: Create a stunningly colourful sky
David Chambers is a self- taught marine artist who lives and works in the historic old port of Topsham, where he runs a small studio-gallery business and also supplies to galleries around the UK and Holland.
Related articles
How Do You Paint Rocks in Oil Color
Source: https://www.creativebloq.com/how-to/paint-a-seascape-oils